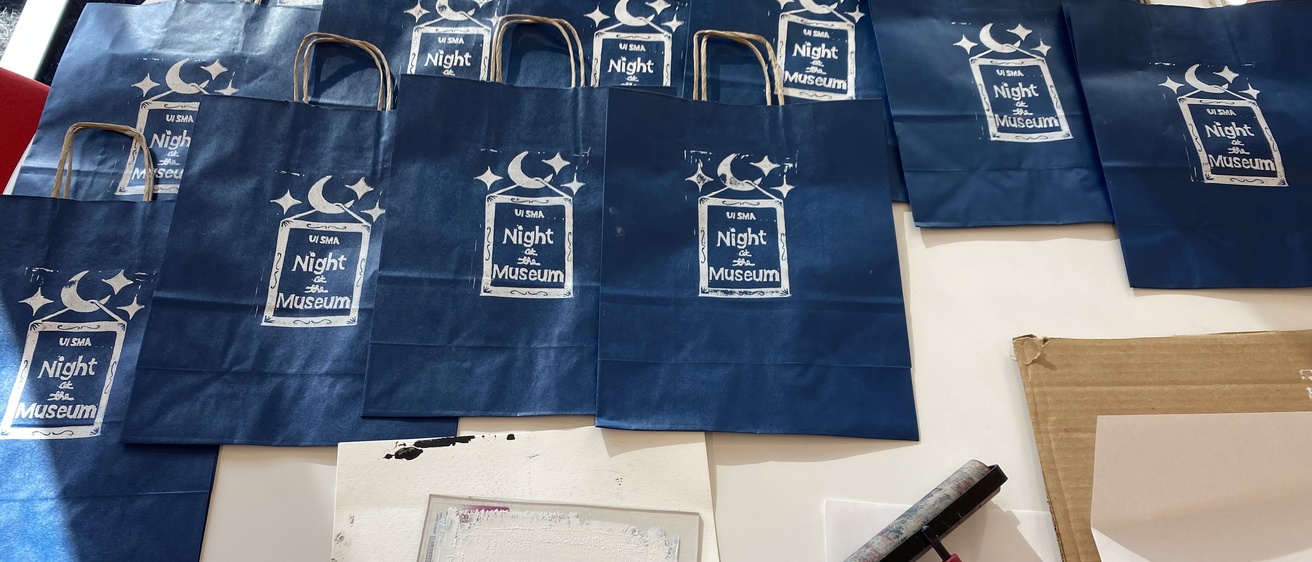
Following our first student event this semester, Night at the Museum: The Art of Voting, featuring lino-cut blocks, we have decided to continue using lino-cuts for our next events with a stamp for branding our take-and-make kits! We thought, since these block prints have now made an appearance in multiple events, we would walk you through our process of making them if you want to make your own at home!
If you can, taking a class is always good (the university has an amazing printmaking department!), but YouTube videos, kit instructions, or our instructions can give you a good start!
Materials:
- Linoleum blocks (or a wood block if you have a lot of confidence in yourself to not make the wrong cut!), you can choose the size!
- Speedball Linoleum Cutter (we used Assortment #1 which gives you a variety of blades, but any lino cutter will work!)
- A pencil for drawing or tracing your design
- Block printing ink (we used the Speedball fabric ink for printing on tote bags/other fabric goods)
- Brayer
- An ink plate (you can use most flat, nonporous surfaces for this if you don’t want to go out and buy something!)
Instructions
Start by thinking about what kind of design you want! For our Night at the Museum: the Art of Voting event we wanted politically inspired images, as well as some that recalled some works from the Stanley’s collection. For our Night at the Museum stamp, we wanted something more general—just something that could tell people what the event was!
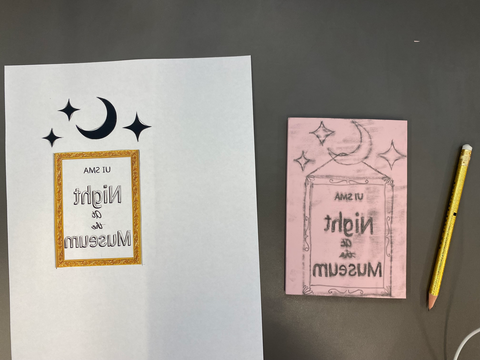
For this general stamp, I sketched out what I had in mind, made a mock-up in Canva, and printed out a mirrored image of this. Whatever your design is (something you drew, something you found online, etc.) keep in mind that you will need to mirror the image before you copy it onto your lino block! To do this, I recommend uploading your design to your computer (or a word document), flipping it, and then printing it out (this will save you the headache of trying to free hand a mirror image).
I then took my mirrored image, colored the back in with a graphite pencil, and traced the image onto my linoleum block. By covering the back in graphite, the printer paper acts as transfer paper, marking the block where I traced the image.
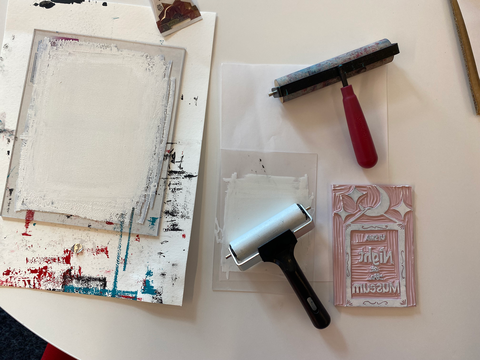
At this point I was ready to carve. I started with a medium sized carving blade, carving out the general or less complicated lines. I then went in with a smaller blade to carve out the more detailed portions of the image (things like letters). Finally, I went in with the largest blade to carve out any excess blank space. This process can take a long time depending on how complicated your image is, so I recommend starting with a simpler image if this is your first block print! With this, it can be easy to go too fast or use too much pressure while carving the block, so try to take your time to avoid injuring yourself with the blade!
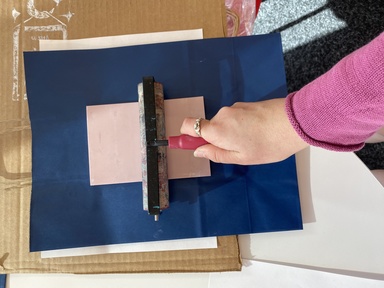
Once the image is carved it’s time to ink! Start by applying a few dollops of ink onto your inking plate and rolling over it (both vertically and horizontally) with your brayer. Once your ink is evenly spread out (it should be a very thin layer), you can roll your brayer onto your image! Make sure you coat the block evenly so that all parts of your image have enough ink. The amount of ink you need on your block to produce an image may differ based on what you are printing on, for example, we needed quite a bit for the tote bags, but much less for other fabrics or paper. To find the right amount for your prints you may want to do a few test prints.
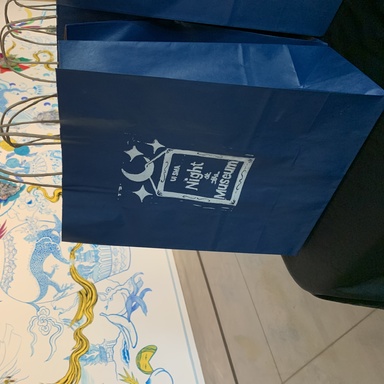
Now you are ready to print! Flip your block onto your surface (paper, fabric, or whatever else you would like!), and apply pressure, but be careful that your block doesn’t move around. To apply pressure, I like to use an extra (clean!) brayer, but your hands or a book would work just fine. Now lift up your block and you’re done! Allow your print to dry and follow any instructions on the ink if you need to heat-set it (for some fabric inks).
For those of you who have read this far, thank you! We hope this has been helpful, and if you have any questions feel free to ask us on Instagram, or email!


